|
Tranzview Server User’s Manual
|
Logic
control setup
|
No programming is
required!
Configure
applications using simple "fill-in-the-blank" HTML forms
|
Please
step-by-step setup "Configure applications"
|
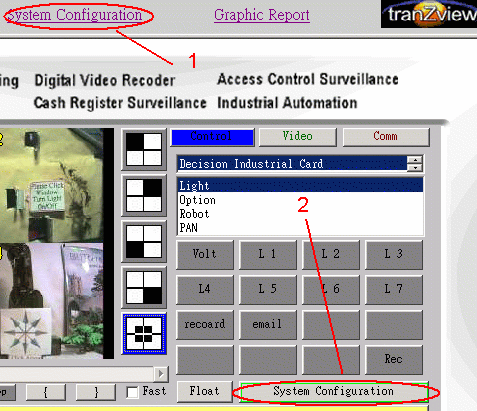
Step 1 and 2: |
Click for Login systems
configuration mode and setup parameters.
|
|
|
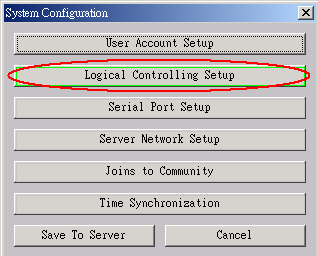
Step
3:
|
Click Logical control setup
button
|
|
|
Step 4, 5 and 6:
|
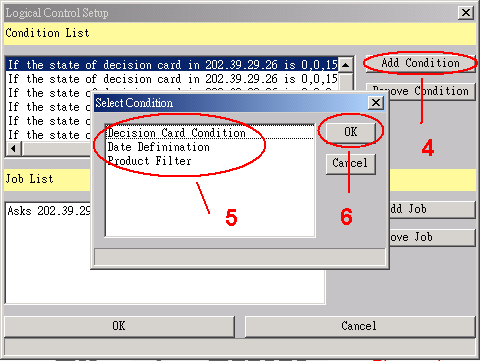
Click Add Control condition
button for select Control Condition
Decision Card Condition - for definition hardware device
Date definition - for setup device auto start and stop time.
Product Filter - For setup RS232 serial port data input condition
control.
|
|
|
Step
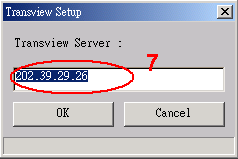
7:
|
Setup server IP addresses, IP
address can be self or another machine in defend IP address.
Note: The Tranzview Web server can be access by self or other Web
client for easily administers all Tranzview server nodes on an intranet
or the Internet.
|
|
|
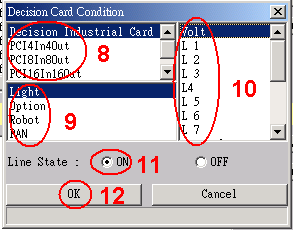
Step
8:
|
Select device and device ON/OFF
state
|
 |
|
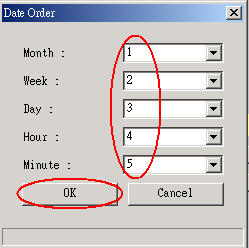
Setup date and time to control
device by schedule |
|
|
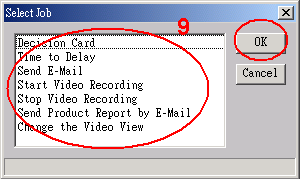
Step
9:
|
Select Job for control process
|
|
|
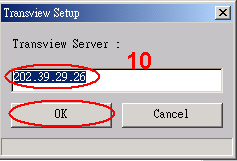
Step
10:
|
Setup device IP addresses, IP
address can be self or another device in other defend computer IP
address.
|
|
|
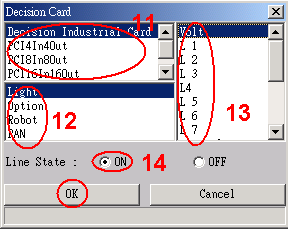
Step
11-14:
|
Select device and device states
|
|
|
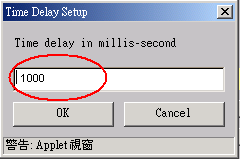
Step
15:
|
Time delay for device delay
action time, unit is m/Sec.
|
|
|
Step
16:
|
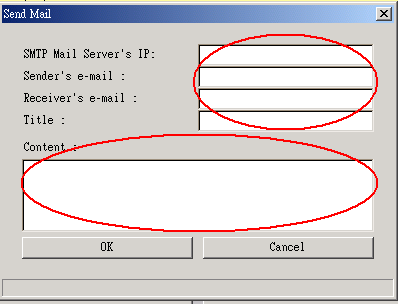
Setup sends email for report or
alarm function.
|
|
|
Step
17:
|
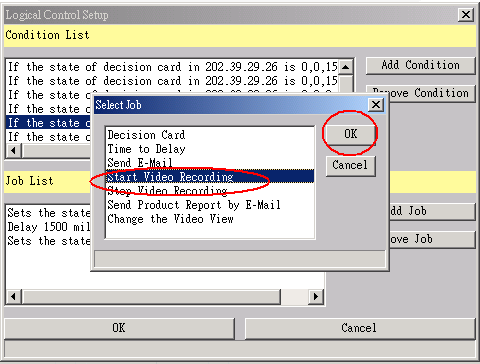
Setup start and stop recoding.
|
|
|
Step
18:
|
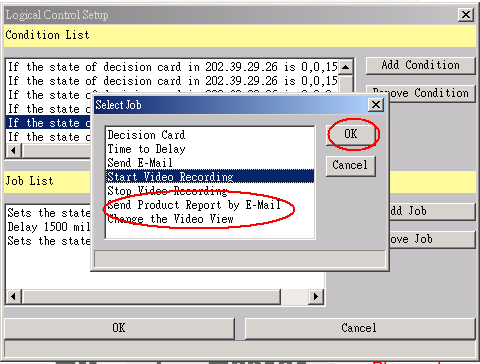
Setup sends product report by
email and changes the video view
|
|
|